Windows:
Open Windows Explorer:
target connection & “Ctrl + G”
History log:
Ctrl + H
(the log will be over-written when Navicat restarts)
Open a query editor:
Ctrl + Q
Find record in a table:
Ctrl + F
Open multiple windows:
“Tools” menu > “Options” > “General” > “Allow Multiple
Form Instance” & “Allow Multiple Navicat Instances” > OK
Starts import wizard:
Drag import files over and drop into the target database
Edit value:
“Tools” menu > “Server Monitor” > targeted database
type > “Variable” tab > click the button next to the value/ press “Ctrl +
Enter” > edit value > “OK”
(edit values directly for the variables in MySQL &
Oracle servers only)
Create open table shortcut:
right click a table > “Create Open Table Shortcut…” >
the table shortcut can be saved outside Navicat
Action to a query by right-drop:
Right-drop a query from Navicat to a Windows location >
Copy/ Move/ Create query shortcuts
Action to a query by left-drop:
Left drop a query from Navicat to Windows location> Move
query
Available batch job list:
New “Batch Job” > Navicat logo on the left panel > the
data transfer & data synchronization profiles are shown on “Available Jobs”
column
Enable the table hint option:
“Tools” menu > “Options…” > “Appearance” > “Main
Window” > “General” > check “Show table hint” > OK > point at a
table to show the hint
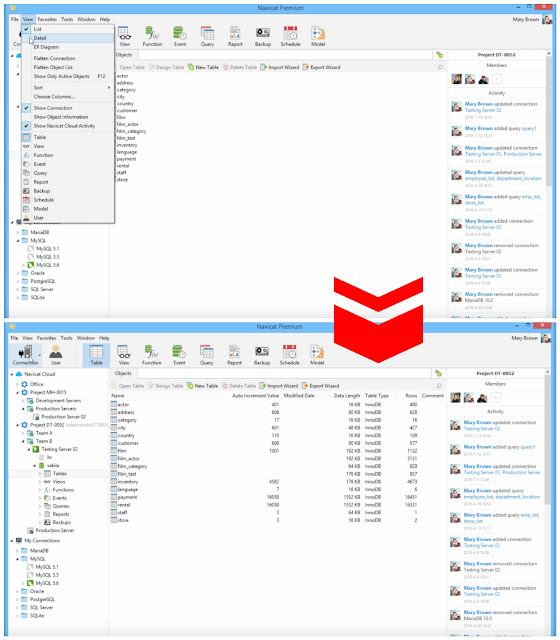
Show objects’ detail:
“View” menu > check “Detail”
Rearrange & specify columns:
“View” menu > “Choose Columns…”
Mac:
Open log:
Cmd – L
Find record in a table:
Cmd – F
Open multiple windows:
Menu > “Preference” > “General” tab > check “Allow
opening multiple instances”
Starts import wizard:
Drag import files over and drop into the target database
Edit value:
Menu > “Tools” > “Server Monitor” > “Variables” tab
> click the button next to the value > edit value > “OK”
(edit values directly for the variables in MySQL &
Oracle servers only)
Open table:
Simply drag & drop the table from Navicat to the desired
location
Available batch job list:
New “Batch Job” > Navicat logo on the left panel > the
data transfer & data synchronization profiles are shown on “Available Jobs”
column
Enable/ disable primary key warning:
Menu > “Preferences” > “Grids” tab > check/ uncheck
“Show primary key warning”
Show objects’ detail:
Menu > “View” > check “Detail”
Rearrange & specify columns:
Menu > “View” > “Customize Columns…”
Linux:
History log:
Ctrl + H
(the log will be over-written when Navicat restarts)
Open a query editor:
Ctrl + Q
Find record in a table:
Ctrl + F
Open multiple windows:
“Tools” menu > “Options” > “General” > “Allow
Multiple Form Instance” & “Allow Multiple Navicat Instances” > OK
Starts import wizard:
Drag import files over and drop into the target database
Edit value:
“Tools” menu > “Server Monitor” > targeted database
type > “Variable” tab > click the button next to the value/ press “Ctrl +
Enter” > edit value > “OK”
(edit values directly for the variables in MySQL &
Oracle servers only)
Available batch job list:
New “Batch Job” > Navicat logo on the left panel > the
data transfer & data synchronization profiles are shown on “Available Jobs”
column
Enable the table hint option:
“Tools” menu > “Options…” > “Appearance” > “Main
Window” > “General” > check “Show table hint” > OK > point at a
table to show the hint
Show objects’ detail:
“View” menu > check “Detail”
Rearrange & specify columns:
“View” menu > “Choose Columns…”


